Welcome to our first blog post from our Nursery Blog Hop! Today's post is a guest blogger Lindsay Chieco. Make sure to follow along for the next 3 weeks to see all the beautiful inspiration from talented makers. Links will be posted HERE
Minky Floor Pillow Tutorial By:
Lindsay Chieco of Linzentart
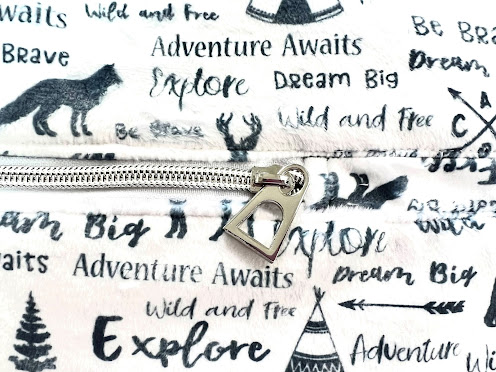
Looking for something to sew for adventure lovers? Below I have provided free instructions to an awesome minky floor pillow suitable for babies, kids and adults! I was inspired to make the floor pillows with this collection because when my kids were younger, they loved lying on their floor pillows, whether it was to read a book or watch a movie. I debated making a blanket with the fabric line, but I thought of how much use we got out of our floor pillows when the kids were young. My favorite print from the collection is the blue mountains! I backed both pillows with that print. I love the blues and greens and the mountains always make me think of adventure. I love how this collection makes me want to get the kids outdoors and explore.
My youngest kid is 8 and he still loves using the floor pillows as well as our animals. See more pictures below.
Materials:
- 3 yards of the Minky Wild and Free Fabric collection
- Pins or sewing clips
- 20 inch Zipper or Zipper Tape
- 10lbs of shredded foam or stuffing of your choice
Cutting Requirements:
- Cut (2) 40 inch squares for the top and bottom of the floor pillow
- Cut (4) 5x41” strips for the sides of the pillow
- Take one of the 5x41” strips and cut in half longways, this will be where you insert the zipper
- Cut a 1.5x10.5” of the side fabric to add on to the ends of the zipper
Directions:
- Sew the 1.5x10.5 inch side fabric pieces to either end of your zipper tape. The zipper tape I used was about 1.5” wide, but if you are using a thinner zipper adjust the measurements of the fabric to match your zipper width. To start, place one of the fabric pieces right side down on top of the zipper, lining up the ends. Sew together using a ½” seam allowance. Pull the fabric piece back and top stitch. Repeat for the other end of the zipper. Now sew each of the 2.5x41” side pieces to each long side of the zipper. Pin in place to avoid shifting. When finished, measure the piece to make sure it measures the same as the other side pieces (5x41”). Trim where needed to get to the right measurement.
- Take each of the side 5x41” fabric pieces and sew together end to end using a ½" seam allowance. Make sure you leave a ½" space at the top and bottom of each seam unsewn. This will be important when sewing them to the top and bottom squares of the pillow. Finish sewing the side pieces by joining the first and last piece so they form a square.
- Take your 40” top square piece and lay it right side up. Place one of the side pieces right side down on top of the square. Fold down the ½" seam you left unsewn and pin or clip the whole side piece to the top square. Minky can be a little finicky to sew with. It is important to keep it in place as much as possible so it doesn’t shift. As you get to each corner, fold down the ½" seam you left unsewn. It should form a nice little square in the corner that will help make a nice square corner when turned right side out.
- Repeat this process with the bottom 40” square. Make sure you leave the zipper at least halfway open so you can turn it out later.
- Once everything is sewn together, turn right side out and push out the corners. I used shredded foam to fill the pillow, but you can also use stuffing. I find the foam a little more cost effective since it will take a lot of stuffing to fill.
*I also made a floor pillow using a patchwork top instead of one solid square. If you are going for this look, cut out (25) 9” squares. Sew them together using a ½" seam allowance until you have a 40” square.
We hope you enjoy this tutorial with minky! A special thank you to Lindsay Chieco for participating in the Nursery Blog Hop!
Follow Lindsay on social media and see more creative patterns on my website:
Instagram: @linzentart
Website: https://www.etsy.com/shop/linzentart
This is the start to our Nursery Blog Hop! Follow along the next 3 weeks for more project inspiration! Schedule below.


No comments:
Post a Comment