Wednesday, December 1, 2021

Holiday Blog Hop: Lish Dorset


Surprise Pocket Holiday Shopper Bag by Lish Dorset!


We partnered up with Lish Dorset, a multi-talented individual who is a sewer, quilter, needlepointer, museum worker, Michigander and the occasional cocktail hand model-er.  Her inspiration for this beautiful holiday bag was her favorite winter coat! It has fleece lined pockets and as soon as she saw our Minky Scarlet Poinsettia print in black, Lish knew exactly how it could be added to a tote - by acting as the surprise lining for a bag pocket, just like the warm lining of her favorite coat’s pockets.


Adding Minky to exterior pockets of a multipurpose tote bag acts as a luxurious surprise every time you slip your hand in, especially on those cooler days out and about. Paired with retro-inspired holiday prints from Michael Miller’s Vintage Holidays collection, you’ve got the makings of a useful and charming tote you’ll want to have with you during the holiday season. And don’t forget - if you forget your mittens, you can always slip your hand inside one of the pockets for a quick warm up! 


Supply List & Cutting List
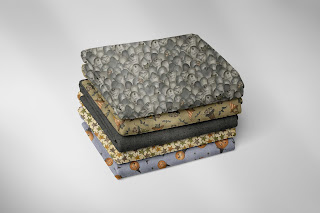
Seam Allowance: ½” (Unless otherwise noted)


Bag Prep

To get started, cut all of your bag pieces with a ruler and rotary cutter, along with the interfacing pieces. Adhere the interfacing to the bag’s exterior and lining panels, along with the strap pieces.


Strap & Trim Construction


Fold a strap piece in half to create a center mark by pressing with your iron. Open the strap piece and fold the long edges into the center mark you just created. Press again. Top stitch the strap using a slightly longer stitch length. Repeat for the other strap piece as well as the pocket trim pieces, and then set aside. 


Pocket Construction


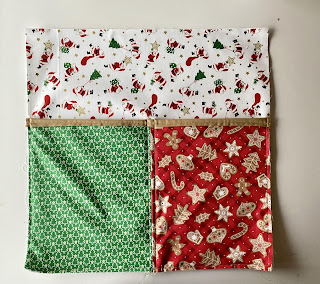
Take one of your Mini Tree pieces and one Gingerbread Treats piece and place right sides together. Sew along the longer 12” side. Press the pocket piece open. Repeat for the two remaining pieces. This is now the “patchwork” pocket piece.


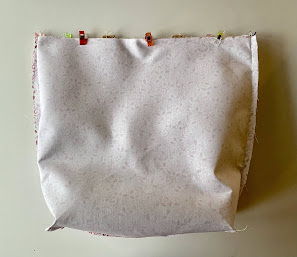
Next, place one patchwork pocket piece on top of the Minky pocket lining. Secure the pieces to each other with clips along the top and sides. Sew along the top side, but instead of pressing open, press the pieces away (wrong sides) from each by pressing with your hands or a Hera Marker. Repeat for the second exterior pocket. 


Your pockets will be complete once the Gingerbread Cotton Couture accent trim pieces have been added. Clip one trim piece onto a completed pocket piece and top stitch into place, sewing down the middle of the trim. Repeat for the remaining pocket and trim pieces. Trim each pocket piece to 11” tall.


Exterior Bag Construction


Place one completed exterior pocket on an exterior bag piece, aligning the raw edges together at the bottom. Clip into place. Topstitch the front pocket on each side of the front pocket seam, about ¼” away from the seam, backstitching at the top and bottom of the pocket piece. Next measure up 3 ¼” from the bottom of the pocket. Mark a line with your Hera Marker; sew along this line. (This will help prevent treasures from slipping too far into your bag’s pockets!). Once sewn, baste the pocket onto the bag exterior using a ¼” seam. Repeat for the other exterior bag panel and pocket piece.


To attach your straps to your bag, find the center of the bag and then mark 2” away from the center on both sides. Clip your straps onto these marks and baste into place. 


Mark a 3” square in each corner of the bag exterior pieces and cut out. 


With handles and pockets basted onto the exterior bag pieces, it’s time to create the bag shell. Clip the exterior bag pieces together, making sure to line up the pocket pieces on both sides, as well as patchwork seams at the bottom of the bag. Sew together with a ½” seam on all three sides (leaving the square areas open for now), making sure to back stitch at the beginning and end. Press the bag’s seams open.


Finally, box the corners of the bag. Sandwich the square opening together, matching up the bag’s seams. Sew closed with ½” seam, making sure to back stitch at the beginning and end. Repeat for the other side of the bag.

Turn the bag's exterior right side out. Set aside.


Lining Construction

Creating the lining is just like creating the bag exterior. Mark a 3” square in each corner of the bag. Clip the pieces together, right sides, and sew all three sides, making sure to leave an opening at the bottom for turning the bag. Box the corners of the lining just as you did for the bag’s exterior. Press the seams open, but do not turn the lining right side out.


Completing the Bag


Place your bag exterior shell into the bag lining, matching up the seams on either side. (Make sure the handles are tucked down.) Clip your bag and lining pieces together. Sew the exterior and lining together using a ½” seam. Once completed, pull the bag’s exterior through the lining opening, pushing out the corners in the lining as well as the exterior. Sew the lining closed.


Push the closed lining into the bag exterior, making sure the exterior and lining pieces are flush. Press the top of the bag. Top stitch one last time around the exterior bag to complete your tote. 


Follow Lish Dorset on social media:

Instagram: @lishdorset


Our Holiday Blog Hop Continues! Follow along for the next two weeks. Schedule Below


Thursday, Dec 2nd 2021- Sarah Vedeler

https://www.machineembroideryapplique.com/blog/Christmas-Ornament-Collection


Wednesday, Dec 8th 2021- Mitzie from Jittery Wings


Thursday, Dec 9th 2021- Allison Ramsing


(Links will be added on day of post)


Here are a few more Christmas tutorials and Quilt pattern instructions to help you get ready for the holidays!: 


Watch Holiday Wrap Tutorial Here: https://youtu.be/aesbBK_Zmxg


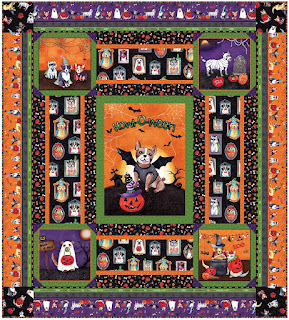
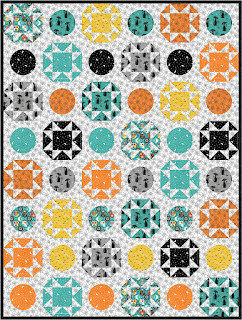
Vintage Holidays Letters to Santa Quilt by Susan Emory 


Grand Holiday Quilt by Heidi Pridemore


Free Pattern Download available here: https://www.michaelmillerfabrics.com/grand-holiday-quilt.html


Follow us on social media @michaelmillerfabrics and our brand ambassador to see more Christmas projects for inspiration!


Happy Holidays and Happy Sewing!

Sunday, November 28, 2021

Holiday Blog Hop


Hello Fabric Lovers!


We are excited to announce our 2021 Holiday Blog Hop!  Follow along to get inspired by a variety of fabulous makers! From quilts to crafts, these 5 sewers have created beautiful items using our holiday themed prints and Basics. Join us over the next 2 weeks as we deck out for the holidays and share our love of sewing with this beautiful community!
The links to each blog will be active on the scheduled day of each blog post. 


Wednesday, October 13, 2021

10 HALLOWEEN PROJECT IDEAS!


      Deciding What to Make This Halloween?     

          Here Are 10 Fun Ideas Using Michael Miller Fabrics         

1. Make a Witch Hat:


Whoof Whoof!  The best witch costume goes to this pup! This festive witch hat was made with the magical "When the Stars Align" collection by Alicia Dujets! 

View full collection HERE


2. Make a DIY Mask costume


You can make a quick and easy mask with our "Making it fun Mask Panel" 

Trick or treating is not canceled this year! Be safe and have fun wearing a mask with this quirky mask panel, 24 designs in total From elephants to a vampire with fangs, we got you covered! 

Watch Rob’s tutorial on how to make the elephant costume:

https://youtu.be/cl650pdfjoI


3. Quilt with our Cotton Couture Solids and other Basics

This lovely Boo pattern is by Charisma Horton made with Cotton Couture. Boo quilt pattern is available HERE 

Add some texture and fun to any project with our other basics like Black & white and Garden Pindot or even our glow in the dark Fairy Frost!   

View all Cotton Couture Solids HERE

View all basic collections HERE 


4. Quilt with Panel Blocks


No tricks just treats! The Howl-O-Ween Quilt by Heidi Pridemore is a Free pattern! Download it HERE


View more from Heidi on her social media!

Instagram: @whimsicalworkshop

Website: thewhimsicalworkshop.com


5. Sew up a Trick or Treat Bag


These are sure to fit all your candy! Halloween themed bags are made by Tara Sinclair with our Hocus Pocus collection. View collection HERE and she used The John Duffel Bag Pattern which is available HERE and the Unagi Asymmetrical Clutch pattern by Sincerely Jen patterns which is available HERE 

View more from Tara on her social media!

Instagram: @uhohcreations 

Website: www.uhohcreations.com


6. Make 2 Costumes out of 1 Pattern


The Francesca dress pattern by Suze Vinton is the perfect design for any costume! From a fall princess to a scary witch, just switch up the fairy frost colors and add some accessories to make your dream look. Pattern is available HERE 

View all Fairy Frost colors HERE


View more from Suze Vinton and CKC Patterns on social media

Instagram: @beralusvintondesign @ckcpatterns  

Website: ckcpatterns.com

Modeled by: @maddiesfashionista


7. Make 3-D Paper-Mâché Pumpkins 


Don't worry about rotting pumpkins this year! Make them out of fabric instead. Watch Rob Appell show his mad crafting skills with this enjoyable pumpkin project using our Coco basic HERE

View the full Coco collection HERE


8. Make the Bats and Cats Quilt 


Bats and black cats! What’s not to love. The Bats and Cats Quilt by Marsha Evans Moore is available as a Free pattern!  Instructions are available for download HERE

View our Hocus Pocus collection HERE to see more Stray Cat Strut panel colors and cat coordinates.


9. Make the "Wicked Fun" Quilt and Table Runner 


The "Wicked Fun" Quilt and table runner by Heidi Pridemore is available HERE

It is made with the lovely and spooky Halloween on Broome Street collection by Jacqueline Paton! View the full collection HERE


10. Get Inspired by These Amazing Makers


Spooktacular projects made by Sarah Anne Smith with the Howl-O-Ween collection!

Instagram: @sarahannsmithq

Website: http://www.sarahannsmith.com/index.php


Polka Party Quilt Pattern quilt by Charisma Horton made with the Hocus Pocus collection. Pattern is available HERE

Instagram: @charismahorton

Website: charismascorner.com


To place a wholesale order, please contact your sales rep or visit us at michaelmillerfabrics.com! 


HAPPY HALLOWEEN &

HAPPY SEWING! 


Wednesday, September 29, 2021

Apply to be a 2022 Brand Ambassador

 ATTENTION QUILTING INDUSTRY DESIGNERS & BLOGGERS

Want to gain exposure while sewing with the best fabric?
APPLY TO BECOME A 2023 "MAKING IT FUN" BRAND AMBASSADOR!

Michael Miller Fabrics provides bold design, inspires creativity and offers exceptional customer service, all while “Making it Fun!”. Now is your opportunity to join the team as a Brand Ambassador!
What it means to be a Brand Ambassador:

1.    Share your love for Michael Miller Fabrics

2.    Broaden your skill set and explore new techniques in group challenges.

3.    Create buzz around new product launches by featuring Michael Miller fabrics on your blogs and social media platforms.

4.    Include our promo badge on your website and social media.

5.    Tagging @michaelmillerfabrics on posts and using the hashtags #michaelmillerfabrics and #makingitfun.

6.    Provide feedback to our marketing team.

Perks of being a Brand Ambassador:

1.    Free fabric and goodies.

2.    Promotion of you and your brand by sharing your content on our social media channels.

3.    Opportunities for you to be featured on our blog and marketing channels.

4.    Sharing our promo badge and other graphics and images for your posts.

5.    Opportunities for your patterns/projects to be included in our catalogs and marketing materials.

6.    Connections to magazine publications for your projects using Michael Miller fabric.

What we looking for: 
This is the perfect opportunity for those actively building a brand in the quilting industry. We are looking for enthusiastic designers and bloggers to promote our brand and fabric through social media, online or in-person events and social media channels. Our Brand Ambassadors must have active social media outlets, be experienced quilters and engaged in the quilting community

What is required:
Fabric collections will vary and you create your own projects. We will provide all fabric required for program-related projects, plus other goodies. Brand Ambassadors are asked to make a minimum of 7 projects for the year that will be promoted by them and our channels. You may offer free patterns or patterns that you sell commercially. We are looking for posts from the opening reveal of what’s in the box to the final project. Facebook live, Instagram Live, videos and product demos are encouraged.
Ambassadors may be asked to provide projects for our sales reps, Quilt Market and magazine outlets. Ambassadors are expected to actively participate in a private, ambassadors-only, Facebook group and respond to emails. MEETING DEADLINES IS A MUST!
This ambassadorship runs February 1, 2023-December 31, 2023.
If you have questions, please email: shari@michaelmillerfabrics.com.
How to apply:
Click link below and fill out the application. Applicants will be assessed by the marketing team at Michael Miller Fabrics based on your blog content, posting regularity, social media content and photography. Thank you in advance for your application!

THE DEADLINE TO APPLY IS November 23, 2022.