Wednesday, January 19, 2022

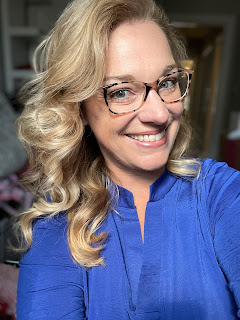
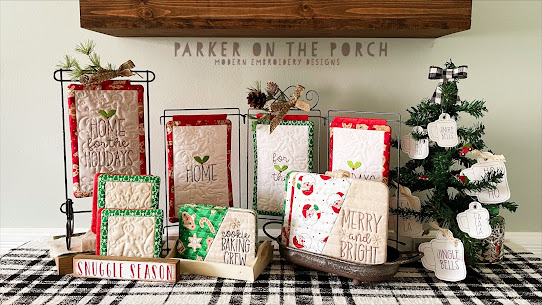
Brand Ambassador Intro- Jen Chesnick of Parker on the Porch

 
We are very excited to introduce you to, Jen Chesnick, another one of our new 2022 Brand Ambassadors! Her colorful and cute designs are sure to be inspiring! Her specialties are bags and quilted crafts and we can't wait for you to see all the amazing projects she creates. Learn all about her below!

Shop: parkerontheporch.com

Facebook: facebook.com/parkerontheporch

Facebook Group: facebook.com/groups/parkerontheporch

Instagram: instagram.com/parkerontheporch

Youtube: youtube.com/parkerontheporch


Hi I’m Jen from Parker on the Porch. I started my stitching journey by way of the paper crafts industry roughly 8 years ago.  I’ve always been a crafty and creative person and was taught to sew and hand embroider at a young age.  After the birth of my daughter I was interested in the shift to PDF patterns in sewing, so I taught myself how to construct clothing and I was hooked.   

One of my first projects was with my most favorite Michael Miller fabric line, Out to Sea. It still is one of my most favorite dresses ever! The dress pattern is the Petite Fille by Puperita and this photo is featured there after all these years. 


In the fall of 2014 I ran across projects using an embroidery machine.  Specifically putting holiday designs on dresses.  I bought my first embroidery machine and away I went.  It didn’t take long for me to start creating my own designs. In 2015 I launched my own website to sell the designs I was creating as a small side hustle.  In 2019 I left my corporate job of 24 years to design full time. 


I enjoy creating a wide variety of projects.  From bright and cute kids designs to date night bags and home decor projects. 


In the past couple years I have branched out from teaching machine embroidery online to in person classes.  I have the absolute best time teaching and hanging out with a bunch of crazy crafty people! This also includes my daughter! She loves to sew and has enjoying setting up for classes as well as taking them herself. 


When I am not designing you can find me creating sewing projects, paper crafts, home decor projects and traveling. I am thrilled to join the Michael Miller team and cannot wait to share my projects with you. 


Be sure to follow Jen with the links below to see all the Michael Miller fun she'll be sharing!


Shop: parkerontheporch.com

Facebook: facebook.com/parkerontheporch

Facebook Group: facebook.com/groups/parkerontheporch

Instagram: instagram.com/parkerontheporch

Youtube: youtube.com/parkerontheporch


Tuesday, January 18, 2022

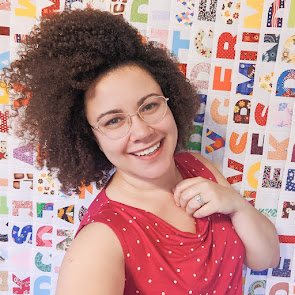
Brand Ambassador Intro: Daisi Toegel

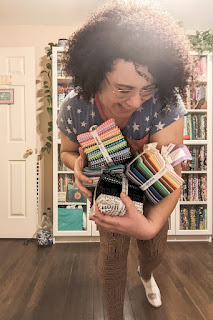
We are very excited to introduce you Daisi Toegel, one of our new 2022 Brand Ambassadors. Daisi is quilter and pattern designer based in New Jersey, who loves working with bright colors and mixing modern and traditional patchwork style into her work.

She loves to sew many different types of projects that include quilts, bags and sometimes garments. Recently, Daisi had her first magazine feature for a modern quilt pattern she designed for Love Patchwork & Quilting. Many of the projects she shares includes free tutorials published on her website. We are grateful to have her as part of the Michael Miller Family and can't wait for you to see all of her beautiful creations. Read more about her below!

Website (blog and shop): www.flowersew.com 

Instagram: @daisitoegel

Pinterest: @daisitoegel

Hi, i'm Daisi! I was born in Sao Paulo, Brazil and my background is in Economics and Masters in Finance, a field that I worked in for almost 8 years. In 2015 I came to the US for a work-study interexchange program of 2 years, and I met/dated my American husband during this period, after the program was over we got married in New Jersey where we live with 3 cats and a hamster.


I got interested about sewing during my interexchange program, I watched lots of Youtube videos on how to sew bags for over a year before I had a sewing machine. Then, in 2016 my husband (boyfriend at the time) gifted me a sewing machine, and that’s how it all started, I am a self-taught sewer and quilter. I used to make bags from purchased and free patterns available online, and sell them at craft shows all over NJ, and after one year sewing I started creating my own designs, but had never sold any bag pattern until 2021. 


In 2020, after being exhausted from sewing masks, I wanted to try something different and decided to make my first quilt, an 80in x 90in that is the only quilt I have that was quilted by a long-arm professional as quilting my own quilts became my favorite part of the process, I’ve quilted over 50 quilts since I started.


I also enjoy other hobbies: I paint in acrylic, oil and watercolors, I love loom knitting, lettering and some crochet as well.

Regarding sewing and quilting, that are both my main activities, I enjoy traditional piecing, foundation paper piecing and English paper piecing. Designing is my dear passion that I take as a relaxing time for expressing my inner view of everything beautiful I come across. 

I prefer to stand in the traditional quilt designer style with a modern touch, as I do love and inspire myself more towards classic and conventional patterns with a contemporary twist.

My favorite color is to use the rainbow palette as I can’t choose one single color, and most of my projects are multicolored.

Be sure to follow Daisi with the links below to see all the Michael Miller fun she'll be sharing!


Website (blog and shop): www.flowersew.com 

Instagram: @daisitoegel

Pinterest: @daisitoegel


Friday, January 14, 2022

Expert Tips & Tricks for Labeling Your Quilts


It’s no secret that quilters accumulate lots of projects over the years! How do you keep track of them all? The New Year is a perfect time to get organized! Adding a label to projects is an important part of the quilting process as it helps document information about the quilt and its maker for years to come. Here are a few tips and tricks from our quilting experts to help make the process easy! 


Tips from Kristi McDonough from Schnitzel and Boo: 

Kristi includes the date, name, recipient name and a few words to describe why she made the quilt on the label. She also likes to include a “repair kit” in her quilts and will mark it on the label (there is an extra block/fabric located xxx to make future repairs, as needed” then when it comes time to fix anything, the recipient can open up the quilt and have an exact match. To make the repair kit, she gives her longarm quilters an extra block or pieces of fabric that are large enough to make future repairs. Just make sure to mark “the extra block” on the label! The long arm quilter then places the block or fabric between the backing and batting and longarms as usual. This will help prevent having to use unmatched fabric for future repairs. If it comes time to fix anything, the recipient can open the quilt and have an exact match.

Tips from Debby Kratovil from Quilter by Design:

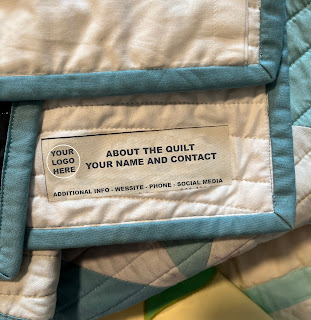
  1. Incorporate the label into the binding so there’s no hand sewing.
  2. Create stand-alone labels and then interfaced them to turn raw edges under and finish it with some hand stitching or use a sewing machine. The secret is to write necessary information on one half of the label with a Pigman Micron pen, so it won’t wash out. A great place to add an extra label is on the underside of the rod pocket. 

Get the free PDF instructions for Quilt labels and Rod Pockets from Debby here: https://www.dropbox.com/sh/jert5o85s57h4ta/AADcIMN40x_XfrWGatd8CMeAa?dl=0

  1. You can also use your sewing machine alphabet to write out the information if it has built in letters! Some brands offer designs for flourishes and borders.

Tips from Lora Zmak and Lisa Norton from Material Girlfriends: 

Use a fast and easy method to labeling with printable fusible paper or fabric. Note that it can fade over time with washing, but this is a good hack to use if you are pressed with time or are looking for a temporary solution. 

Tips from Kris Poor from Poor House quilts for labeling small projects: 

Handwrite a length wide twill tape using a micron pen, fold it and sew it into a seam! In addition, you can take the twill tape and add some fabric borders and have a fancy label that can be stitched to a flat surface.

Tips from Mel Beach from Mel Beach Quilts: 

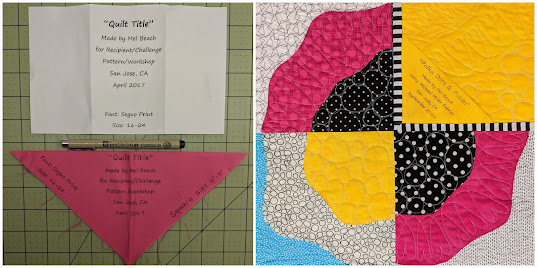
  1. Start with a 6-8" square of a light color fabric. Cotton Couture solids are perfect because there a ton of colors to choose making it easier to match with your quilt! 
  2. Fold in half diagonally. 
  3. On your computer, type up the quilt label information: quilt title, maker's name(s), finish date, and other relevant information.
  4. Print out and place on a light box and/or sunny window with the half of the label taped on top. 
  5. Use a Micron pen to trace the information onto your fabric. Micron pens come in different tip sizes and colors ideal for personalizing the label. 
  6. Press with a hot dry iron to set the archival ink. Baste into the corner of your quilt before attaching the binding. 


Which method of labeling will you be implementing next?

Happy Sewing and Happy Labeling!

Learn more about these quilt experts with their links below:


Kristi McDonough

Instagram: @schitzelandboo

Website: https://www.schnitzelandboo.com/


Debby Kratovil

Facebook: https://www.facebook.com/QuilterbyDesign

Website: https://debbykratovilquilts.blogspot.com/


Lora Zmak and Lisa Norton

Instagram: @material_girlfriends

Website: http://materialgirlfriends.com/


Kris Poor 

Instagram: @poorhousequilts

Website: https://www.poorhousequiltdesigns.com/


Mel Beach

Instagram: @melbeachquilts

Website https://melbeachquilts.com/


Wednesday, January 12, 2022

Meet Our MMF 2022 Brand Ambassadors!


Meet our 2022 Brand Ambassadors!

We are fortunate to have six members of the quilting elite joining our Michael Miller family. These quilters, designers and bloggers are tremendously talented. We are so excited that they will be working with our fabric collections and sharing their enthusiasm for Michael Miller fabrics for the next year. Keep an eye on our blog as we will be posting more detailed information on each of them throughout the month of January.

You can start to follow all of them on social media by clicking their links below

Mariana Diaz

Website: www.sewmariana.com 

Instagram: www.instagram.com/sewmariana

Pinterest: www.pinterest.com/sewmariana 

Facebook: www.facebook.com/sewmariana


Daisi Toegel

Website: www.flowersew.com 

Instagram: www.instagram.com/daisitoegel

Pinterest: www.pinterest.com/daisitoegel


Jen chesnick

Shop: parkerontheporch.com

Facebook: facebook.com/parkerontheporch

Facebook Group: facebook.com/groups/parkerontheporch

Instagram: instagram.com/parkerontheporch

Youtube: youtube.com/parkerontheporch


Tamara Kielstra

YouTube: www.youtube.com/c/tamarasjoydiy

Instagram: www.instagram.com/tamarasjoy

Website: www.tamarasjoy.com

Shop: www.shoptamarasjoy.com 


Stephanie Carton

Facebook Group: https://www.facebook.com/groups/1613284762244720
Facebook Page: https://www.facebook.com/TheEliMonster

Instagram: https://www.instagram.com/theelimonster/

Pinterest: https://www.pinterest.com/theelimonster/

Youtube: https://www.youtube.com/channel/UCnOxVlIc9ODErMXsD6jgwOQ

Twitter: https://twitter.com/theelimonster


Yulia Reshetnikova

Instagram: https://www.instagram.com/quiltcreation/

Blog: https://yuliyaresh.blogspot.com

Facebook: https://www.facebook.com/yuliya.reshetnikova.1/

Wednesday, December 1, 2021

Holiday Blog Hop: Lish Dorset


Surprise Pocket Holiday Shopper Bag by Lish Dorset!


We partnered up with Lish Dorset, a multi-talented individual who is a sewer, quilter, needlepointer, museum worker, Michigander and the occasional cocktail hand model-er.  Her inspiration for this beautiful holiday bag was her favorite winter coat! It has fleece lined pockets and as soon as she saw our Minky Scarlet Poinsettia print in black, Lish knew exactly how it could be added to a tote - by acting as the surprise lining for a bag pocket, just like the warm lining of her favorite coat’s pockets.


Adding Minky to exterior pockets of a multipurpose tote bag acts as a luxurious surprise every time you slip your hand in, especially on those cooler days out and about. Paired with retro-inspired holiday prints from Michael Miller’s Vintage Holidays collection, you’ve got the makings of a useful and charming tote you’ll want to have with you during the holiday season. And don’t forget - if you forget your mittens, you can always slip your hand inside one of the pockets for a quick warm up! 


Supply List & Cutting List

Seam Allowance: ½” (Unless otherwise noted)


Bag Prep

To get started, cut all of your bag pieces with a ruler and rotary cutter, along with the interfacing pieces. Adhere the interfacing to the bag’s exterior and lining panels, along with the strap pieces.


Strap & Trim Construction


Fold a strap piece in half to create a center mark by pressing with your iron. Open the strap piece and fold the long edges into the center mark you just created. Press again. Top stitch the strap using a slightly longer stitch length. Repeat for the other strap piece as well as the pocket trim pieces, and then set aside. 


Pocket Construction


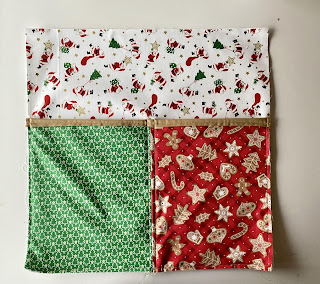
Take one of your Mini Tree pieces and one Gingerbread Treats piece and place right sides together. Sew along the longer 12” side. Press the pocket piece open. Repeat for the two remaining pieces. This is now the “patchwork” pocket piece.


Next, place one patchwork pocket piece on top of the Minky pocket lining. Secure the pieces to each other with clips along the top and sides. Sew along the top side, but instead of pressing open, press the pieces away (wrong sides) from each by pressing with your hands or a Hera Marker. Repeat for the second exterior pocket. 


Your pockets will be complete once the Gingerbread Cotton Couture accent trim pieces have been added. Clip one trim piece onto a completed pocket piece and top stitch into place, sewing down the middle of the trim. Repeat for the remaining pocket and trim pieces. Trim each pocket piece to 11” tall.


Exterior Bag Construction


Place one completed exterior pocket on an exterior bag piece, aligning the raw edges together at the bottom. Clip into place. Topstitch the front pocket on each side of the front pocket seam, about ¼” away from the seam, backstitching at the top and bottom of the pocket piece. Next measure up 3 ¼” from the bottom of the pocket. Mark a line with your Hera Marker; sew along this line. (This will help prevent treasures from slipping too far into your bag’s pockets!). Once sewn, baste the pocket onto the bag exterior using a ¼” seam. Repeat for the other exterior bag panel and pocket piece.


To attach your straps to your bag, find the center of the bag and then mark 2” away from the center on both sides. Clip your straps onto these marks and baste into place. 


Mark a 3” square in each corner of the bag exterior pieces and cut out. 


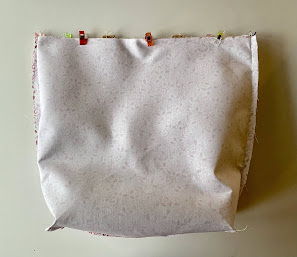
With handles and pockets basted onto the exterior bag pieces, it’s time to create the bag shell. Clip the exterior bag pieces together, making sure to line up the pocket pieces on both sides, as well as patchwork seams at the bottom of the bag. Sew together with a ½” seam on all three sides (leaving the square areas open for now), making sure to back stitch at the beginning and end. Press the bag’s seams open.


Finally, box the corners of the bag. Sandwich the square opening together, matching up the bag’s seams. Sew closed with ½” seam, making sure to back stitch at the beginning and end. Repeat for the other side of the bag.

Turn the bag's exterior right side out. Set aside.


Lining Construction

Creating the lining is just like creating the bag exterior. Mark a 3” square in each corner of the bag. Clip the pieces together, right sides, and sew all three sides, making sure to leave an opening at the bottom for turning the bag. Box the corners of the lining just as you did for the bag’s exterior. Press the seams open, but do not turn the lining right side out.


Completing the Bag


Place your bag exterior shell into the bag lining, matching up the seams on either side. (Make sure the handles are tucked down.) Clip your bag and lining pieces together. Sew the exterior and lining together using a ½” seam. Once completed, pull the bag’s exterior through the lining opening, pushing out the corners in the lining as well as the exterior. Sew the lining closed.


Push the closed lining into the bag exterior, making sure the exterior and lining pieces are flush. Press the top of the bag. Top stitch one last time around the exterior bag to complete your tote. 


Follow Lish Dorset on social media:

Instagram: @lishdorset


Our Holiday Blog Hop Continues! Follow along for the next two weeks. Schedule Below


Thursday, Dec 2nd 2021- Sarah Vedeler

https://www.machineembroideryapplique.com/blog/Christmas-Ornament-Collection


Wednesday, Dec 8th 2021- Mitzie from Jittery Wings


Thursday, Dec 9th 2021- Allison Ramsing


(Links will be added on day of post)


Here are a few more Christmas tutorials and Quilt pattern instructions to help you get ready for the holidays!: 


Watch Holiday Wrap Tutorial Here: https://youtu.be/aesbBK_Zmxg


Vintage Holidays Letters to Santa Quilt by Susan Emory 


Grand Holiday Quilt by Heidi Pridemore


Free Pattern Download available here: https://www.michaelmillerfabrics.com/grand-holiday-quilt.html


Follow us on social media @michaelmillerfabrics and our brand ambassador to see more Christmas projects for inspiration!


Happy Holidays and Happy Sewing!

Sunday, November 28, 2021

Holiday Blog Hop


Hello Fabric Lovers!


We are excited to announce our 2021 Holiday Blog Hop!  Follow along to get inspired by a variety of fabulous makers! From quilts to crafts, these 5 sewers have created beautiful items using our holiday themed prints and Basics. Join us over the next 2 weeks as we deck out for the holidays and share our love of sewing with this beautiful community!
The links to each blog will be active on the scheduled day of each blog post.